12_Gadget应用实例之zero
参考资料:
-
《06_libusb的使用》
-
《11.5_从数据传输的角度理解Gadget框架》
-
实验代码:GIT仓库
source/12_USB/05_libusb_zero
1. 编写程序
1.1 编程思路
涉及的程序如下图所示:
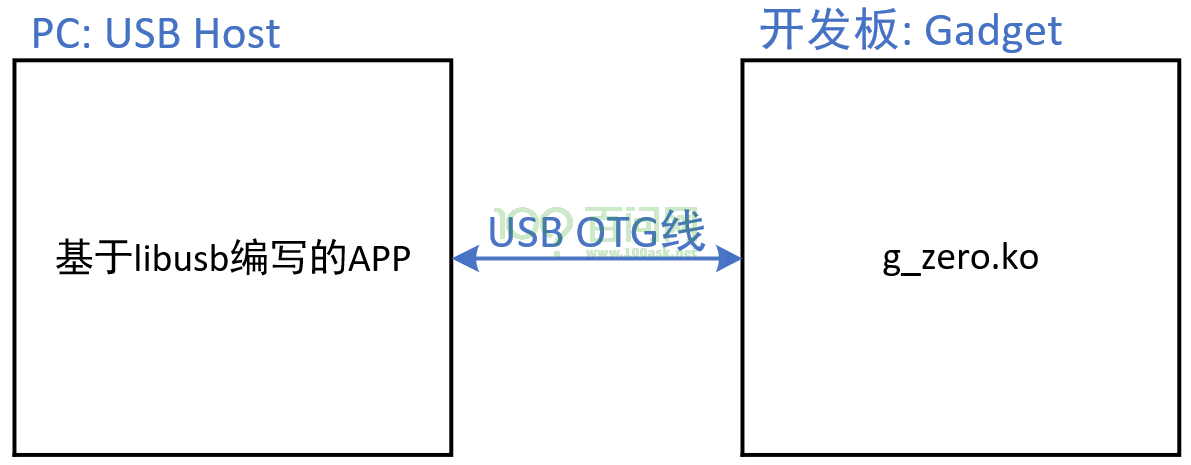
基于libusb编写程序:
- 找到设备
- 选择配置:loopback、sourcesink
- 得到端点:找到interface进而得到endpoint
- 读写数据:操作endpoint
1.2 zero设备的描述符
在Ubuntu里执行如下命令:
$ lsusb -v -d 0525:a4a0
可以列出zero设备的描述符:
Bus 001 Device 002: ID 0525:a4a0 Netchip Technology, Inc. Linux-USB "Gadget Zero"
Couldn't open device, some information will be missing
Device Descriptor:
  bLength                18
  bDescriptorType         1
  bcdUSB               2.00
  bDeviceClass          255 Vendor Specific Class
  bDeviceSubClass         0
  bDeviceProtocol         0
  bMaxPacketSize0        64
  idVendor           0x0525 Netchip Technology, Inc.
  idProduct          0xa4a0 Linux-USB "Gadget Zero"
  bcdDevice            4.09
  iManufacturer           1
  iProduct                2
  iSerial                 3
  bNumConfigurations      2
  Configuration Descriptor:
    bLength                 9
    bDescriptorType         2
    wTotalLength           69
    bNumInterfaces          1
    bConfigurationValue     3
    iConfiguration          4
    bmAttributes         0xc0
      Self Powered
    MaxPower                2mA
    Interface Descriptor:
      bLength                 9
      bDescriptorType         4
      bInterfaceNumber        0
      bAlternateSetting       0
      bNumEndpoints           2
      bInterfaceClass       255 Vendor Specific Class
      bInterfaceSubClass      0
      bInterfaceProtocol      0
      iInterface              0
      Endpoint Descriptor:
        bLength                 7
        bDescriptorType         5
        bEndpointAddress     0x81  EP 1 IN
        bmAttributes            2
          Transfer Type            Bulk
          Synch Type               None
          Usage Type               Data
        wMaxPacketSize     0x0200  1x 512 bytes
        bInterval               0
      Endpoint Descriptor:
        bLength                 7
        bDescriptorType         5
        bEndpointAddress     0x01  EP 1 OUT
        bmAttributes            2
          Transfer Type            Bulk
          Synch Type               None
          Usage Type               Data
        wMaxPacketSize     0x0200  1x 512 bytes
        bInterval               0
    Interface Descriptor:
      bLength                 9
      bDescriptorType         4
      bInterfaceNumber        0
      bAlternateSetting       1
      bNumEndpoints           4
      bInterfaceClass       255 Vendor Specific Class
      bInterfaceSubClass      0
      bInterfaceProtocol      0
      iInterface              0
      Endpoint Descriptor:
        bLength                 7
        bDescriptorType         5
        bEndpointAddress     0x81  EP 1 IN
        bmAttributes            2
          Transfer Type            Bulk
          Synch Type               None
          Usage Type               Data
        wMaxPacketSize     0x0200  1x 512 bytes
        bInterval               0
      Endpoint Descriptor:
        bLength                 7
        bDescriptorType         5
        bEndpointAddress     0x01  EP 1 OUT
        bmAttributes            2
          Transfer Type            Bulk
          Synch Type               None
          Usage Type               Data
        wMaxPacketSize     0x0200  1x 512 bytes
        bInterval               0
      Endpoint Descriptor:
        bLength                 7
        bDescriptorType         5
        bEndpointAddress     0x82  EP 2 IN
        bmAttributes            1
          Transfer Type            Isochronous
          Synch Type               None
          Usage Type               Data
        wMaxPacketSize     0x0400  1x 1024 bytes
        bInterval               4
      Endpoint Descriptor:
        bLength                 7
        bDescriptorType         5
        bEndpointAddress     0x02  EP 2 OUT
        bmAttributes            1
          Transfer Type            Isochronous
          Synch Type               None
          Usage Type               Data
        wMaxPacketSize     0x0400  1x 1024 bytes
        bInterval               4
  Configuration Descriptor:
    bLength                 9
    bDescriptorType         2
    wTotalLength           32
    bNumInterfaces          1
    bConfigurationValue     2
    iConfiguration          5
    bmAttributes         0xc0
      Self Powered
    MaxPower                2mA
    Interface Descriptor:
      bLength                 9
      bDescriptorType         4
      bInterfaceNumber        0
      bAlternateSetting       0
      bNumEndpoints           2
      bInterfaceClass       255 Vendor Specific Class
      bInterfaceSubClass      0
      bInterfaceProtocol      0
      iInterface              6
      Endpoint Descriptor:
        bLength                 7
        bDescriptorType         5
        bEndpointAddress     0x81  EP 1 IN
        bmAttributes            2
          Transfer Type            Bulk
          Synch Type               None
          Usage Type               Data
        wMaxPacketSize     0x0200  1x 512 bytes
        bInterval               0
      Endpoint Descriptor:
        bLength                 7
        bDescriptorType         5
        bEndpointAddress     0x01  EP 1 OUT
        bmAttributes            2
          Transfer Type            Bulk
          Synch Type               None
          Usage Type               Data
        wMaxPacketSize     0x0200  1x 512 bytes
        bInterval               0
它有2个配置:
- 第1个配置(bConfigurationValue = 2)对应loopback功能:里面有1个接口,接口有1个setting,下面有2个endpoint
- 第2个配置(bConfigurationValue = 3)对应SourceSink功能:里面有1个接口,接口有2个setting
- 第1个setting下面有2个endpoint:都是bulk端点
- 第2个setting下面有4个endpoint:2个是bulk端点,另外2个是Isochronous端点
1.3 编程
参考libusb示例:libusb/examples/xusb.c
2. 上机实验
实验步骤:
-
先安装g_zero驱动程序:在开发板上执行
modprobe g_zero -
然后连接OTG线到PC
-
在Ubuntu中识别出设备
-
执行测试程序
-
先编译:在Ubuntu里执行如下命令
apt-cache search libusb # 查找libusb开发包sudo apt install libusb-1.0-0-dev # 安装libusb开发包gcc -o zero_app zero_app.c -lusb-1.0 # 编译 -
测试:在Ubuntu里执行如下命令
$ sudo ./zero_app -l # 列出设备的配置值config 0: bConfigurationValue = 3config 1: bConfigurationValue = 2# 测试loopback功能$ sudo ./zero_app -s 2 # 选择loopback的配置$ sudo ./zero_app -wstr www.100ask.net # 写入字符串current config: 2in_ep = 0x81, out_ep = 0x1$ sudo ./zero_app -rstr # 读出字符串current config: 2in_ep = 0x81, out_ep = 0x1Read string: www.100ask.net$ sudo ./zero_app -w 1 2 3 4 5 6 7 8 # 写入8个字节current config: 2in_ep = 0x81, out_ep = 0x1sudo ./zero_app -r # 读到8个字节current config: 2in_ep = 0x81, out_ep = 0x1transferred != in_ep_maxlenRead datas:01 02 03 04 05 06 07 08#测试Source/Sink功能$ sudo ./zero_app -s 3 # 选择source/sink的配置book@100ask:~/nfs_rootfs/05_libusb_zero$ sudo ./zero_app -r # 读数据current config: 3in_ep = 0x81, out_ep = 0x1Read datas:00 00 00 00 00 00 00 00 00 00 00 00 00 00 00 0000 00 00 00 00 00 00 00 00 00 00 00 00 00 00 0000 00 00 00 00 00 00 00 00 00 00 00 00 00 00 0000 00 00 00 00 00 00 00 00 00 00 00 00 00 00 00sudo ./zero_app -w 0 0 0 # 写数据, 只能写入0,# 写入其他值将会导致开发板上的驱动认为是错误然后halt out端点# 然后只能重新执行 ”sudo ./zero_app -s 3“ 才能恢复
-